I love this easy technique how to make a baby wrap for babywearing that doesn’t require any sewing skills. Baby slings and baby carrier wraps are such an important part of bonding with baby and allowing the baby wearer free hands. Making your own baby wrap allows you to customize the size and style at minimal cost.

DIY Baby Wrap Sling – No Sewing Required!
Today we are sharing our favorite easy diy baby wrap carriers that are essential for anyone with a baby in the house.
Baby carriers can be costly to purchase at the store, we couldn’t wait to share our diy version. You will only need scissors and the ability to cut fabric in a straight line to make your own baby sling wrap. It’s really that simple and you will soon be baby wearing!
Related: 50+ Ways for Babies to Play – Activities for Babies, and Baby Tried Bacon For The First Time Ever On Christmas [Video]
Best Fabric for Baby Carrier Wrap
The secret to a comfy baby wrap is the fabric. You’ll want to look for fabric that is “interlock” this basically means that it is a stretchy, knitted fabric that is made in such a way that the edges do not fray. As the edges of the fabric don’t fray, this wrap does not require any sewing skills in order to create it.
Safety Warning: Stretchy fabrics do have weight limits so please note that the heavier your baby the more the fabric will stretch. When wrapping your baby with a stretchy fabric ONLY use it on the front of your body where you are closely supervising. A stretchy wrap should NEVER be used for back carriers.
This article contains affiliate links.
How to Make a Baby Wrap Sling
Supplies Needed to Make 2-3 Baby Wraps
Directions to Make a Baby Wrap

Step 1
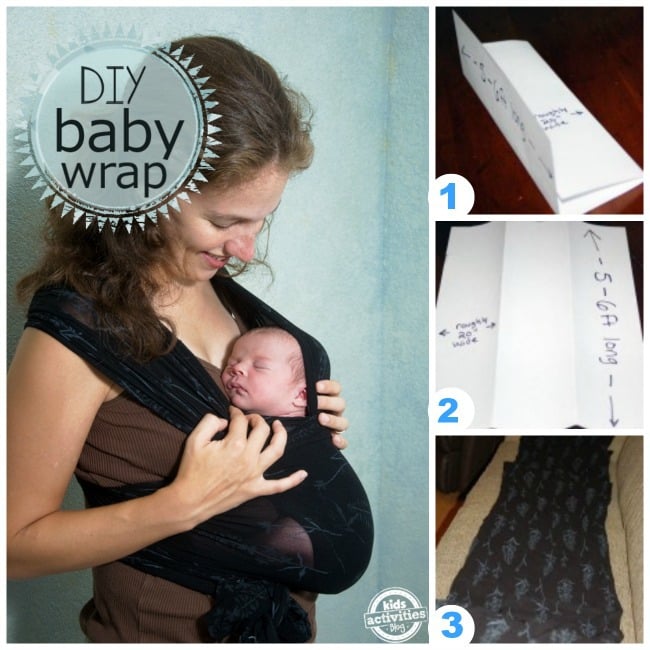
You will want to cut your fabric into long strips.
The width of each strip needs to be a minimum of 16 inches wide (I have some as wide as 25 inches – but they are more bulky). I laid my fabric out on our couch to help contain the yardage as I cut them.
Step 2
I folded the fabric like a hotdog.
Viola!
You now have 2-3 baby wraps! Baby wearing can help you get chores done around the house or to help you calm a fussy baby.
How to Tie a Baby Wrap for Baby Wearing
The first time you tie a baby wrap, it feels complicated! But I promise that once you have done it a few times, it becomes second nature. I thought this video simplified the process for the first time.
I like the front wrap cross carry when the kids are young.
Baby Wrap Instruction Video
Baby Sling Safety

Keep your baby close and keep your baby safe.
When you’re wearing a sling or carrier, don’t forget the T.I.C.K.S.:
Tight
In view at all times
Close enough to kiss
Keep chin off the chest
Support back
–TICKS rules for safe babywearing
Baby Wrap Products We Love

I totally get if you aren’t ready to DIY this important item! Here are a few of our favorite baby wraps and baby slings that are already made for you:
Active Time
5 minutes
Total Time
5 minutes
Difficulty
easy
Estimated Cost
$5
Materials
- You’ll want to get 5-6 yards of interlock fabric – Each batch of fabric can create 2-3 wraps
Instructions
- Cut fabric into long strips a minimum of 16 inches wide and 5-6 feet long.
- Fold long ways into itself in thirds.
- Tie your baby wrap.
MORE BABY FUN FROM KIDS ACTIVITIES BLOG
How did your no-sew baby wrap turn out? Did you make more than one?

