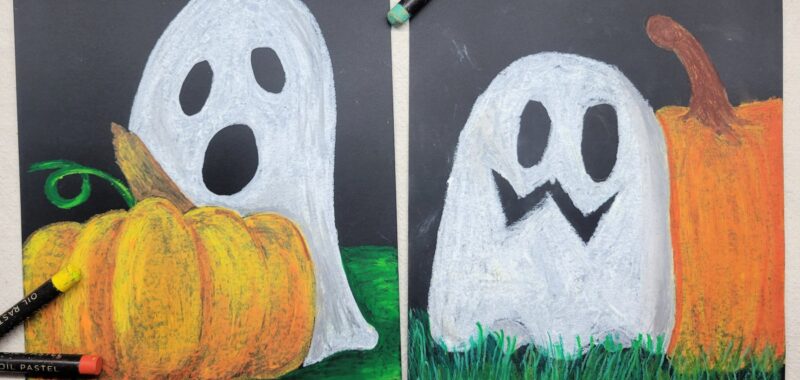
Kids will practice drawing shapes that overlap one another. This project is quick, easy, and perfect for home or classroom use.

Element of Art: Space – Overlapping
Artists use overlapping as a way to create space in their artwork. Overlapping objects gives the illusion that items are stacked behind one another. Items that are in full view appear to be in the front of the picture, while items that are partially hidden appear to be further away. Artists can use overlapping along with perspective and size to further imply space in their artwork.
Related Link – learn about one point perspective with our Interactive Dinosaur project.
Supplies Needed to Make this Ghostly Overlapping Art Project

- Black Paper – we used cardstock
- Oil Pastels
- Pencil
- Optional: Paper Towels – to clean fingers or pastels
Directions to Make Ghostly Overlapping Art
Before beginning, it may be helpful to show kids examples of objects overlapping. You can do this through any image that you have on hand or by looking around the room. Have kids look for an object that appears tucked behind something else. This helps kids understand that while the whole object is there, they can only see a portion of it due to the overlapping object in the front. Kids want to keep this idea in mind as they draw overlapping objects.
Step 1

Begin by sketching a design on the page that consists of at least 2 items. Purposely draw objects that appear to be overlapping. To do this, encourage kids to draw large objects, one partially covering the other. A pencil worked well for us on this step but you may wish to use white charcoal or chalk.
Step 2

Use oil pastels to add a basic layer of color to the shapes. Keep in mind that objects are overlapping. Notice how a portion of the ghost is covered by the pumpkin. The viewer cannot see that portion of the ghost so we do not draw or color what the viewer cannot see.
Step 3

Now we want to add shadows to objects to further illustrate the overlapping effect. To do this, simply pick a darker color to add shadows onto the back image. To shade my ghost, I am using gray to trace along the edge of my pumpkin onto my ghost. Blending until smooth. Continue to change colors and add shadows to further accent the objects overlapping. For example: gray on the ghost, darker orange on the pumpkin, dark green on the grass, etc.
Step 4

Let’s also add some highlights to our design. Now, use a lighter color than the object being highlighted and color on the opposite side of the object. For example: yellow on the pumpkin, brighter green on the grass, etc.
Finished Ghostly Overlapping Art Project

I absolutely love how oil pastels look on black paper! This project is a wonderful opportunity for kids to use their imaginations and practice some basic shading, highlighting, and element of space skills. Since these projects are made on paper, they are easily framed, clipped, or displayed in your preferred style.
Our Experience Making this Ghostly Overlapping Art Project
By keeping objects large and limited to two items, we were able to focus this project on developing the overlapping technique.
I also like that kids are learning valuable drawing skills by adding shadows and highlights while using their imaginations and creating their own designs. Oil pastels are a wonderful way to learn to easily mix colors together for highlights and shadows.
Prep Time
5 minutes
Active Time
15 minutes
Total Time
20 minutes
Difficulty
Medium
Estimated Cost
$1
Materials
- Black Paper – we used cardstock
Tools
- Oil Pastels
- Pencil
- Optional: Paper Towels – to clean fingers or pastels
Instructions
Before beginning, it may be helpful to show kids examples of objects overlapping. You can do this through any image that you have on hand or by looking around the room. Have kids look for an object that appears tucked behind something else. This helps kids understand that while the whole object is there, they can only see a portion of it due to the overlapping object in the front. Kids want to keep this idea in mind as they draw overlapping objects.
- Use a pencil to sketch a design on the page that consists of at least 2 items. Purposely draw large objects that appear to be overlapping (or one in front of the other).
- Use oil pastels to add a basic layer of color to the shapes. Keep in mind that objects are overlapping. If the viewer cannot see a portion of an object, we do not add it to our drawing.
- Now we want to add shadows to objects to further illustrate the overlapping effect. To do this, simply pick a darker color to add shadows onto the back image.
- Let’s also add some highlights to our design. Choose a lighter color to add to the object opposite of the shadow.
Notes
Ghostly Overlapping Art Variations
- Use chalk, chalk pastels, or acrylic paints instead of oil.
- Use white paper with other colorful mediums and designs.
- Adapt the theme to fit any holiday or season.
Ghostly Overlapping Art Variations
- Use chalk, chalk pastels, or acrylic paints instead of oil.
- Use white paper with other colorful mediums and designs.
- Adapt the theme to fit any holiday or season.
Other Fun ghostly Art Projects from Kids Activities Blog
Did your kids enjoy learning about overlapping objects? What spooky scenes did they create?

