[ad_1]
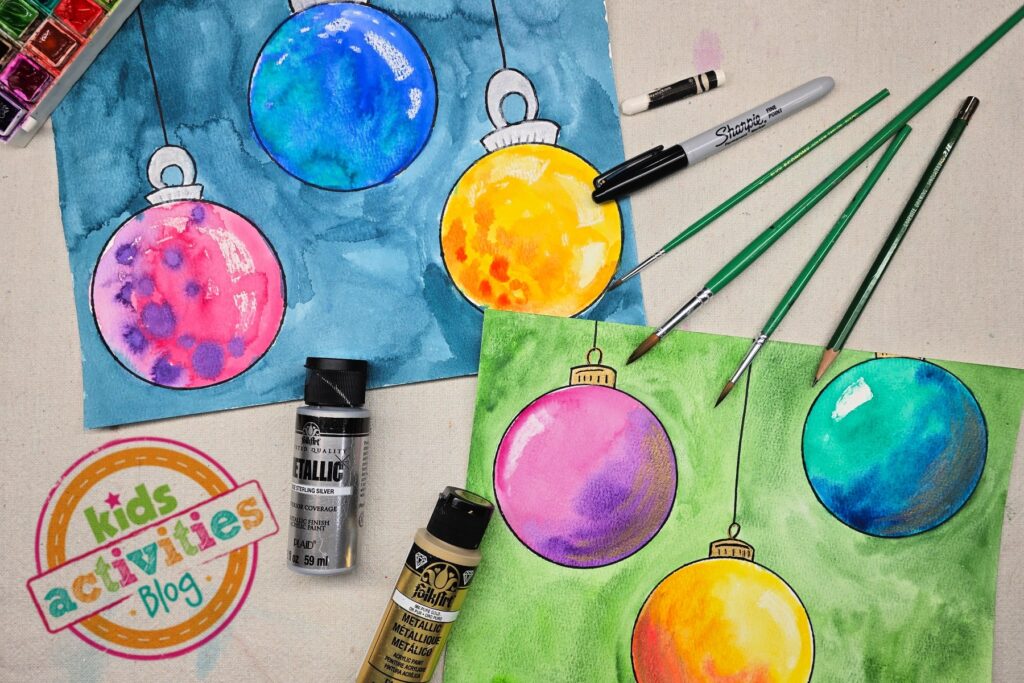
School-aged kids will use watercolor paints to create an analogous ornament painting. This project can easily be completed at home or in the classroom.

What are Analogous Colors?
Analogous Colors are simply colors that are beside one another on the color wheel. Today we are using a combination of two colors per ornament in our project. Examples of analogous color pairs would be: yellow and orange, green and blue, red and purple, etc.
Related: Review Analogous Colors with our free printable pages!
Supplies Needed to Make this watercolor ornament Art Project

- Watercolor Paper
- Watercolor Paints
- White Crayon
- Permanent Marker
- Metallic Paints – we used acrylic paints, but metallic watercolors would also work
- Water
- Paper Towels
- Paintbrushes
- Cup – or other object to trace for ornament shape
Directions to Make Watercolor Ornaments
Step 1

Using a permanent marker, first trace a cup to create ornament shapes on the paper.
Step 2

Then, use the permanent marker to complete the ornament drawings by adding toppers, hangers, and any desired details.
Step 3

Next, using firm pressure, and a white crayon, color a highlight on each ornament.
Step 4

Paint each ornament using a lighter color. Tip: Work quickly as the paint still needs to be wet for the next step.
Step 5

Pick a darker, analogous color, and add a shadow to the side of the ornament opposite of the highlight.
Step 6

Carefully paint a background around the ornaments. Remember: Wet watercolor paints will bleed into one another. Paint around wet ornaments carefully or allow a longer dry-time to prevent accidental color bleeding.
Step 7

Finally, use metallic paint to add finishing touches to your ornaments!
Finished watercolor ornament Art Project

I love how cute and easy these ornaments are to paint! Since these projects are made on paper, they are easily framed, clipped, or displayed in your preferred style for the holiday season.
Our Experience Making this watercolor ornament Art Project
We enjoyed this easy project as a fun way to create seasonal art while exploring various watercolor techniques. We used wax resist to create the highlights on the ornaments, a wet-on-wet blending technique, and reviewed shading with analogous colors!
Prep Time
5 minutes
Active Time
30 minutes
Total Time
35 minutes
Difficulty
Medium
Estimated Cost
$1
Tools
- Watercolor Paints
- White Crayon
- Permanent Marker
- Metallic Paints – we used acrylic paints, but metallic watercolors would also work
- Water
- Paper Towels
- Paintbrushes
- Cup – or other object to trace for ornament shape
Instructions
- Using a permanent marker, first trace a cup to create ornament shapes on the paper.
- Use the permanent marker to complete the ornament drawings by adding toppers, hangers, and any desired details.
- Using firm pressure, and a white crayon, color highlights on one side of each ornament.
- Paint each ornament using a lighter color. Tip: Work quickly as the paint still needs to be wet for the next step.
- Pick a darker, analogous color, and add a shadow to the side of the ornament opposite of the highlight.
- Paint a background around the ornaments. Remember: Wet watercolor paints will bleed into one another. Paint around wet ornaments carefully or allow a longer dry-time to prevent accidental color bleeding.
- Use metallic paint to add finishing touches to your ornaments!
Notes
Analogous Colors – colors that are next to one another on the color wheel.
Watercolor Ornament Art Variations
- Use cookie cutters or multiple sizes of cups to make a variety of ornament shapes.
- Complete the project using another medium such as acrylic, oil pastels, etc.
- Add decorative designs to each ornament with wax resist or other techniques.
Watercolor Ornament Art Variations
- Use cookie cutters or multiple sizes of cups to make a variety of ornament shapes.
- Complete the project using another medium such as acrylic, oil pastels, etc.
- Add decorative designs to each ornament with wax resist or other techniques.
Other Fun christmas Art Projects from Kids Activities Blog
Did your kids enjoy painting these watercolor ornaments? What watercolor technique was their favorite to explore?
[ad_2]
Source link

